
DIY Roman Shades: A Complete Step-by-Step Guide
Roman shades are a timeless window treatment that adds elegance and warmth to any room. Creating your own DIY roman shades not only saves you money but also allows you to customize the fabric, length, and style to perfectly match your decor. This comprehensive step-by-step guide will walk you through the entire process, from measuring your window to installing the finished shade. Whether you’re a seasoned crafter or a beginner, you’ll find these instructions easy to follow. Let’s get started on transforming your windows with beautiful, homemade roman shades.
Why Choose DIY Roman Shades?
DIY roman shades offer several advantages over store-bought options. First, they are significantly cheaper – you can create a high-end look for a fraction of the cost. Second, you have complete control over the fabric pattern, color, and texture, ensuring your shades complement your room perfectly. Third, making them yourself allows you to achieve a custom fit for oddly shaped windows. Finally, the sense of accomplishment and the personal touch add a unique charm to your home. Plus, it’s a fun and rewarding project that can be completed in a weekend.
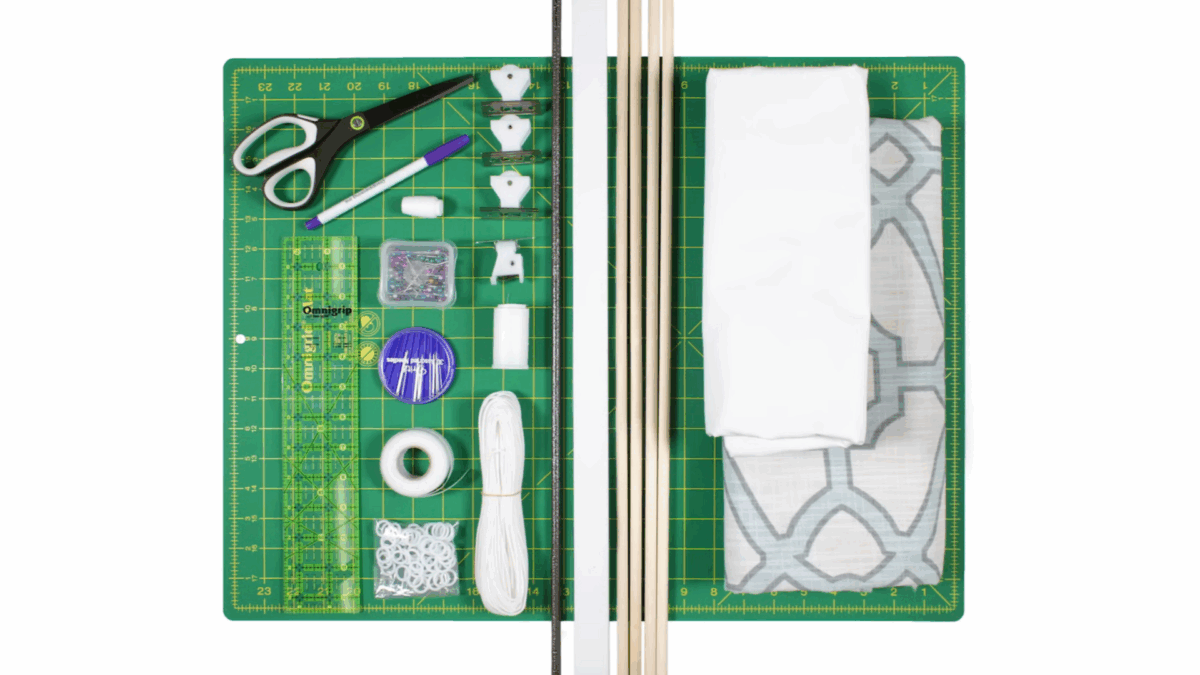
Materials and Tools Needed
Before you start, gather the following materials and tools. Having everything ready will make the process smooth and enjoyable.
- Fabric (choose a medium-weight home decor fabric; consider lining for light control)
- Lining fabric (optional, for privacy and improved drape)
- Roman shade tape (also called ring tape or lift tape)
- Plastic rings (1 inch diameter, in a color matching your tape)
- Lift cords (same color as tape)
- Cord cleat and pull cord (for safety and operation)
- Mounting board (1×2 or 1×3 lumber, cut to window width)
- Screws and anchors (for wall mounting)
- Stapler with 1/4 inch staples
- Scissors or rotary cutter
- Measuring tape
- Iron and ironing board
- Pins and sewing machine (optional, for hems)
- Fabric glue (as an alternative to sewing)
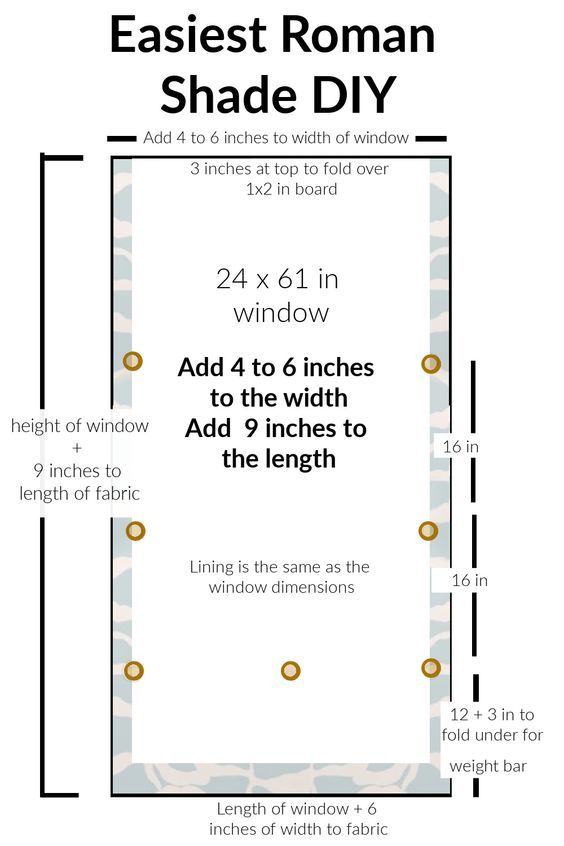
Measuring Your Window
Accurate measurements are crucial for a professional-looking shade. Decide whether you want the shade to hang inside the window frame (inside mount) or outside the frame (outside mount). For inside mount, measure the width at the top, middle, and bottom of the opening, and use the narrowest measurement. For outside mount, measure the desired width, typically overlapping the frame by 1-2 inches on each side. Measure the length from the top of the mounting board to where you want the shade to end. Write down these numbers and add seam allowances: typically add 4 inches to the width and 6 inches to the length for hemming and mounting.
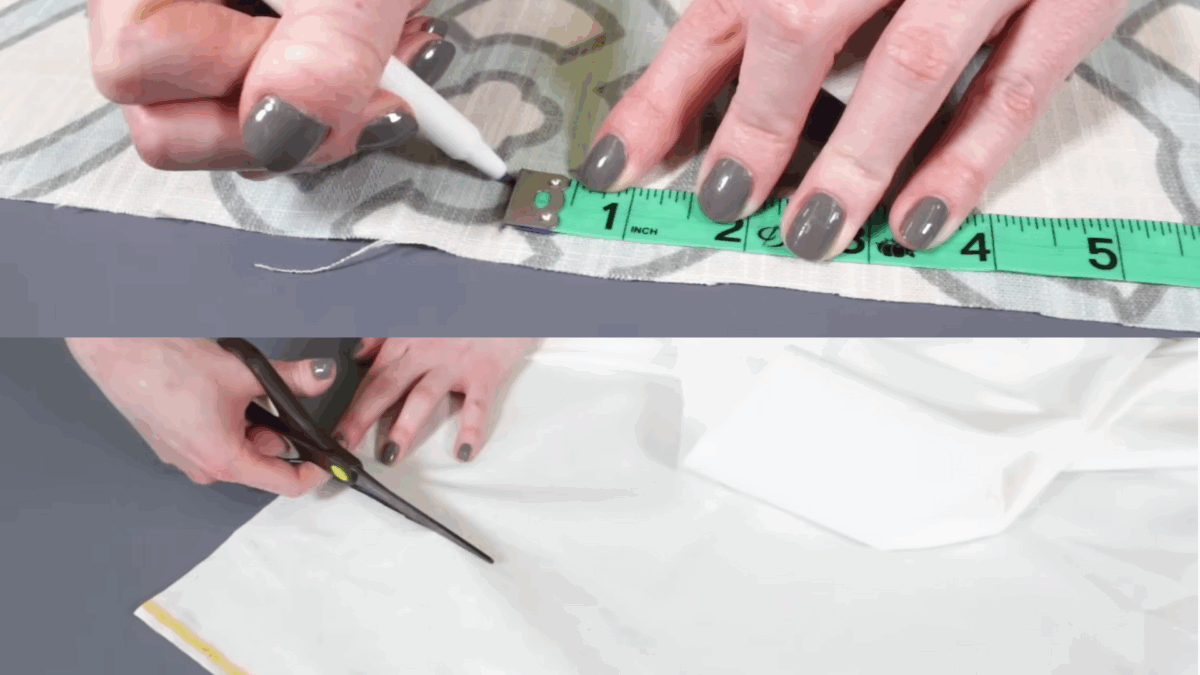
Cutting and Preparing the Fabric
Lay your fabric on a clean, flat surface. Using your measurements, cut the fabric to size with sharp scissors or a rotary cutter. If using lining, cut it the same size as the main fabric. Press both pieces with an iron to remove wrinkles. Next, create a hem on each side by folding the fabric over 1/2 inch and then another 1/2 inch, press, and sew or use fabric glue. For the bottom hem, fold up 1 inch (or more for a weighted look), press, and secure. The top edge will be attached to the mounting board, so leave it raw for now. If you’re adding a lining, place it wrong side against the wrong side of the main fabric, align edges, and baste together along the sides and bottom.
Assembling the Shade

This is where your shade comes to life. First, cut the roman shade tape to the length of your shade (from the top to the bottom hem). You’ll need several vertical strips of tape spaced evenly across the width (typically 10-12 inches apart). Place the tape on the back of the fabric (or lining), aligning it vertically. Secure the tape with staples or glue along its length. Then, sew rings onto the tape at intervals of about 6-8 inches, spacing them evenly from top to bottom. Make sure the rings align horizontally across all strips. Now, cut lift cords: one for each vertical strip of tape. Tie one end of each cord to the bottom ring of its respective strip, then thread the cord upward through all the rings. Secure the top of each cord to the mounting board.
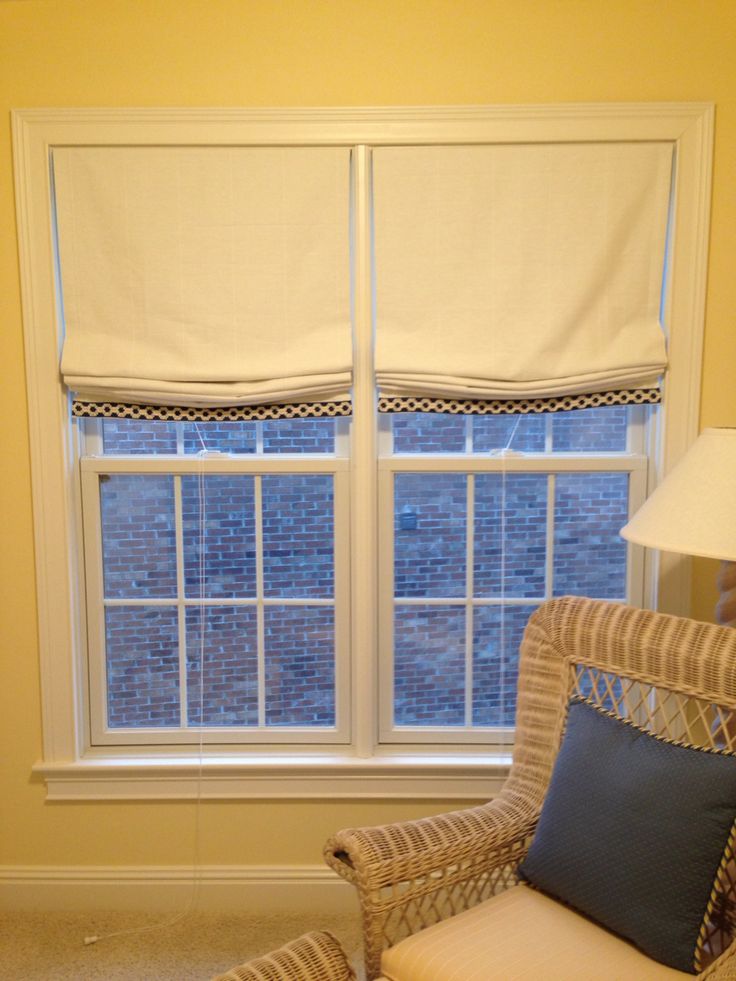
Attaching the Shade to the Window
Mount the installation board (with the shade attached) onto your window frame or wall using screws. If you’re using an inside mount, screw the board into the top of the window frame. For outside mount, screw it into the wall above the window, ensuring it’s level. Once the board is secure, the shade should hang freely. Gather all the lift cords and run them through a cord condensor (a plastic piece that keeps cords together). Trim the cords to your desired length and attach a pull cord. Install a cleat on the wall to secure the cord when the shade is raised. Finally, test the mechanism by pulling the cord to raise the shade evenly. Adjust cord lengths if necessary.
Tips for a Professional Finish
To ensure your DIY roman shades look store-bought, follow these tips. Use heavy-duty staples and a quality stapler for secure attachment. Press the fabric thoroughly before cutting to avoid wrinkles. If using a patterned fabric, make sure the pattern repeats align correctly. For a more structured look, add a lightweight interfacing or iron-on lining. When installing, use a level to ensure the shade hangs straight. Finally, consider adding a decorative trim along the bottom hem for an extra touch of elegance. Practice on a small piece of fabric first if you’re new to sewing.
Frequently Asked Questions
How long does it take to make DIY roman shades?
For a beginner, plan for 3-5 hours per shade, including measuring, cutting, sewing, and installation. With experience, you can reduce the time to 2-3 hours.
Can I make roman shades without sewing?
Yes! Use fabric glue instead of sewing for hems and tape attachment. However, sewing provides more durability. For a no-sew option, choose a self-adhesive roman shade kit available at craft stores.
What type of fabric is best for roman shades?
Choose medium-weight home decor fabrics like cotton, linen, or polyester blends. Avoid heavy upholstery fabrics as they may not fold neatly. Lightweight fabrics can work if lined properly.
How do I clean my DIY roman shades?
Dust regularly with a vacuum brush or lint roller. For deeper cleaning, spot treat with mild soap and water. Most fabrics can be gently hand-washed, but always test a small area first. Avoid machine washing to prevent shrinkage.
Can I motorize my DIY roman shades?
Yes, you can retrofit motorized lift systems. Purchase a compatible motor and follow the manufacturer’s instructions. This is more advanced but adds convenience.
Creating your own roman shades is a rewarding project that enhances your home’s decor while saving money. With patience and attention to detail, you’ll have beautiful, custom shades that you can proudly say you made yourself. Enjoy your new window treatments!


